GPG Tutorial (Eng)
Part 1 – Installing the software
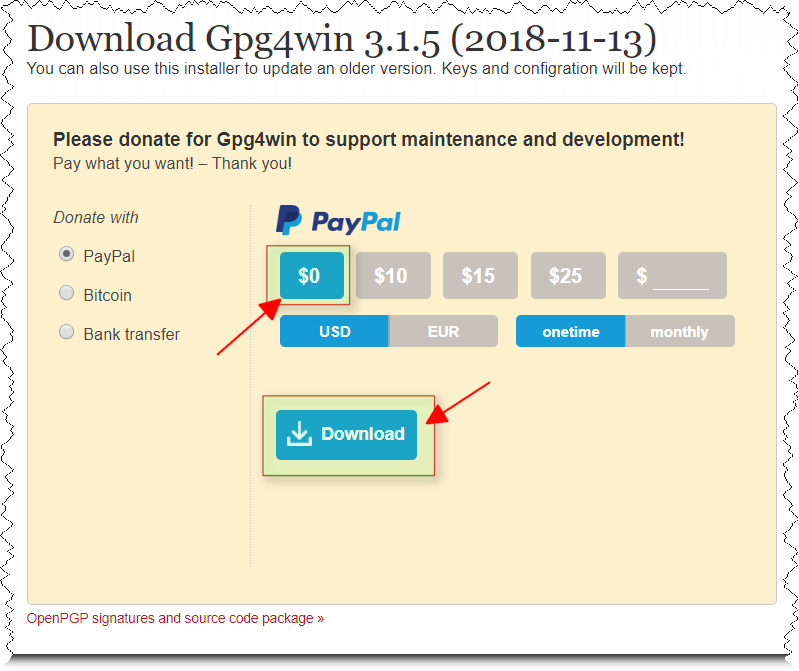
Just like I said above, we’ll be using GPG4Win. If you’re curious, you can view the source code for it here.Head on over to https://gpg4win.org/download.html. We want the full version, so click ‘Gpg4win 3.1.5’. Or whatever version you’ll find as the latest
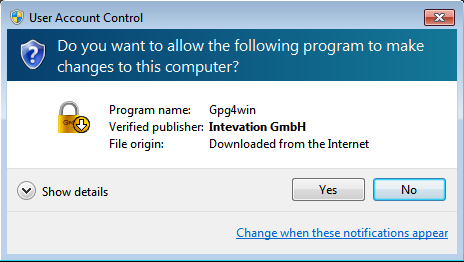
Save it, open it when it’s done downloading. If you have UAC enabled, click ‘Yes’ on the window that appears
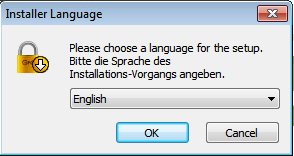
Choose your language, click ‘Ok’
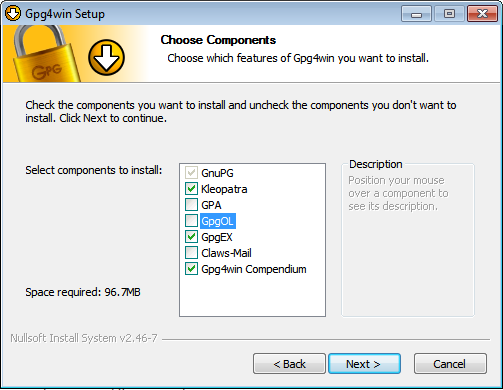
Click ‘Next’, then ‘Next’ again. You’ll now be at a screen asking what components you want to install. We’ll be selecting ‘Kleopatra’, ‘GpgEX’, and ‘Gpg4win Compendium’. Then click ‘Next’
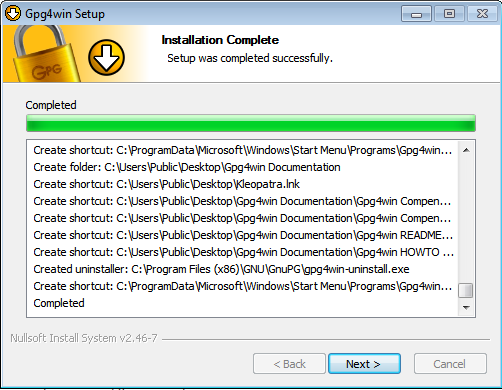
It will ask where to install, just keep the default and click ‘Next’Now it’ll ask where you want to install shortcuts. Select whichever you want, click ‘Next’You can choose which Start Menu folder you want it installed in, just click ‘Next’It will now install, when done you should see this. Click ‘Next’, then ‘Finish’
Now you have the tools you need to get started with PGP
Part 2 – Generating your keypair
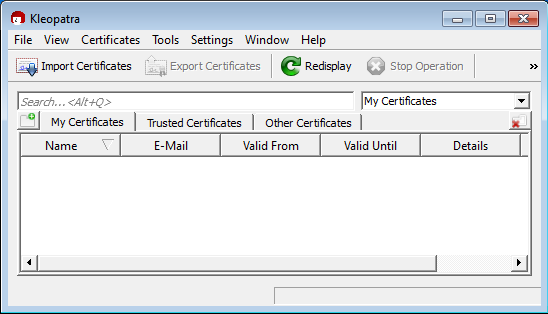
The next step is to generate your keypair so you can encrypt/decrypt messages. Like always, we’ll be going with 4096 bit RSA.Open up Kleopatra, you should be greeted with this beautiful screen
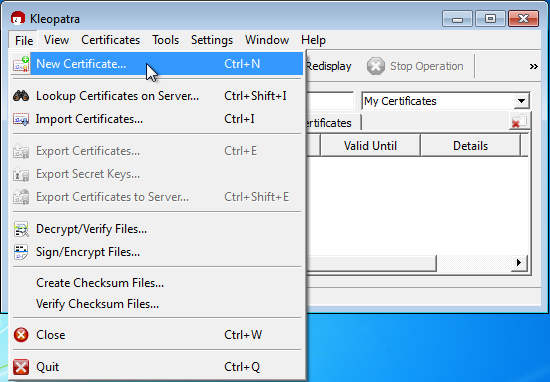
Go to ‘File’, then ‘New Certificate…’
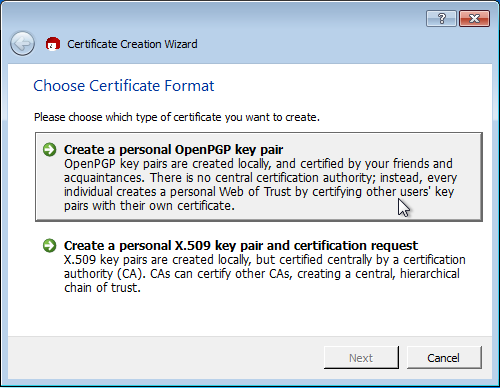
The Certificate Creation Wizard should pop up, click on ‘Create a personal OpenPGP key pair’
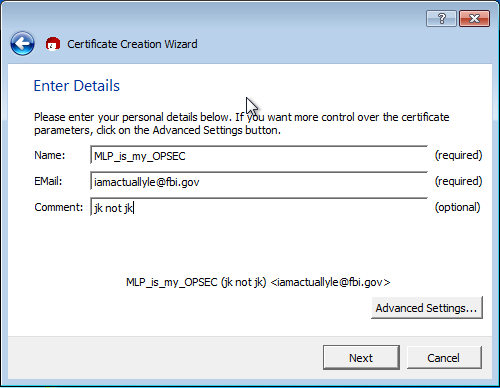
Now you’ll enter your details. Use your marketplace username as ‘Name’, and fill out the rest with whatever you want. You don’t need to use a real email. Check the picture for an example on how it should look
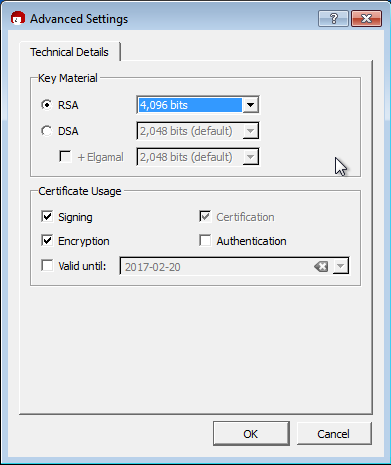
Do not click ‘Next’ yet, we need to fill out some more details. Click ‘Advanced Settings…’, and another window should appear. Under ‘Key Material’, make sure ‘RSA’ is checked. In the drop down menu beside it, and select ‘4,096 bits’. Check the picture to confirm you have everything set correctly, then click ‘Ok’
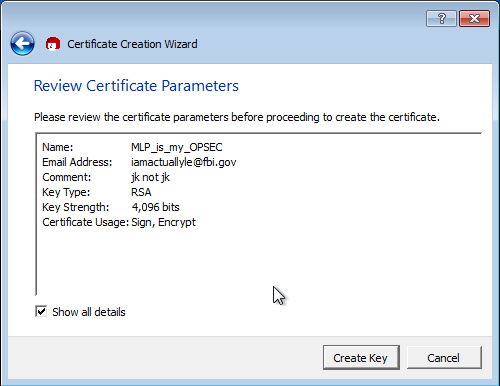
Confirm you filled out all of your info correctly, then click ‘Create Key’
Another window will pop up asking to enter a passphrase. Do so, then click ‘Ok’

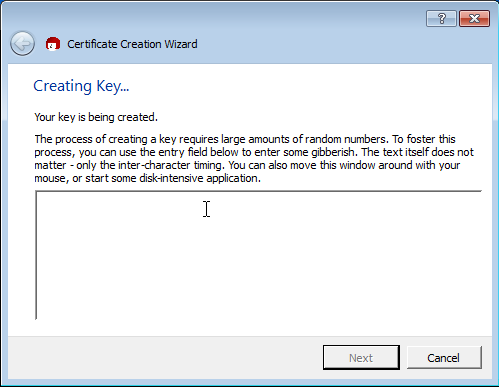
It will now generate your key. It will need you to do random things to create entropy. Mash keys, wiggle the mouse, watch porn, download torrents, whatever
Your key is now created. Go ahead and click ‘Finish’

Part 3 – Obtaining your public key
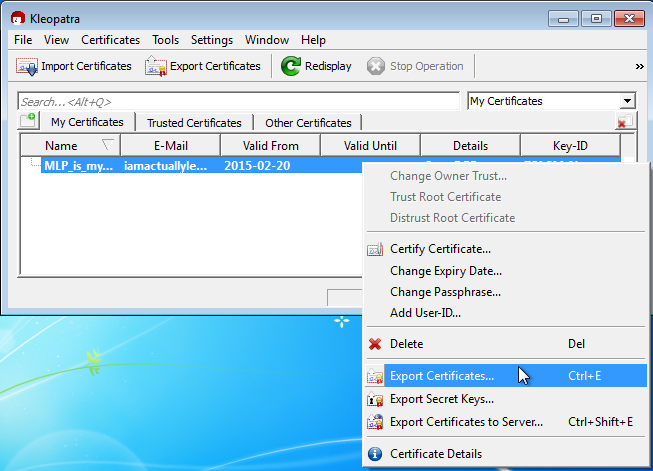
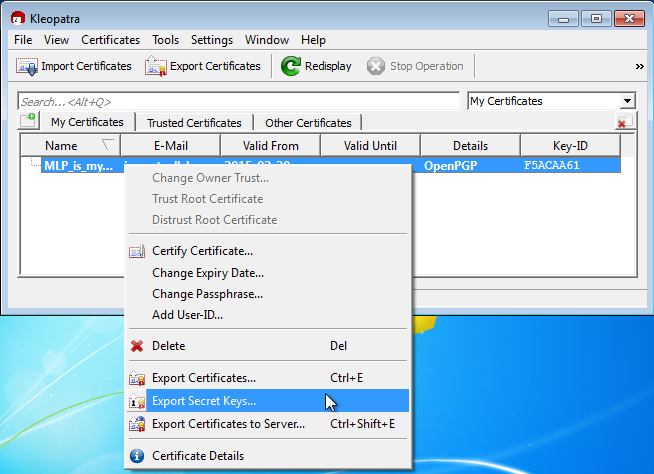
Now we need to get your public key, without it vendors wont be able to send you secure messages.Right click on your key, then click ‘Export Certificates…’
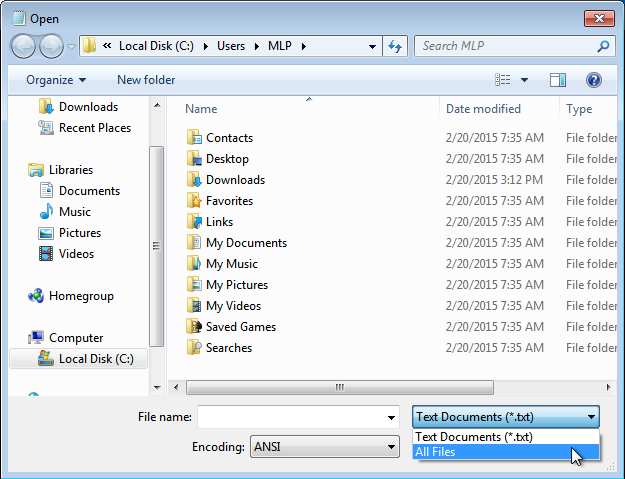
Browse where you want to save, give it a name, then click ‘Save’Open your favourite text editor, browse to where the file is saved. You may have to select ‘All files’ from the dropdown menu. Click the file you saved, then open
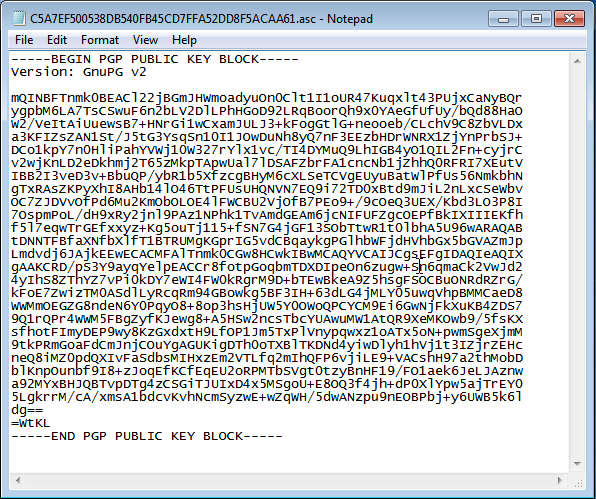
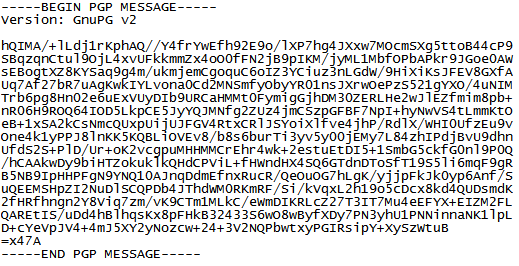
There’s your public key
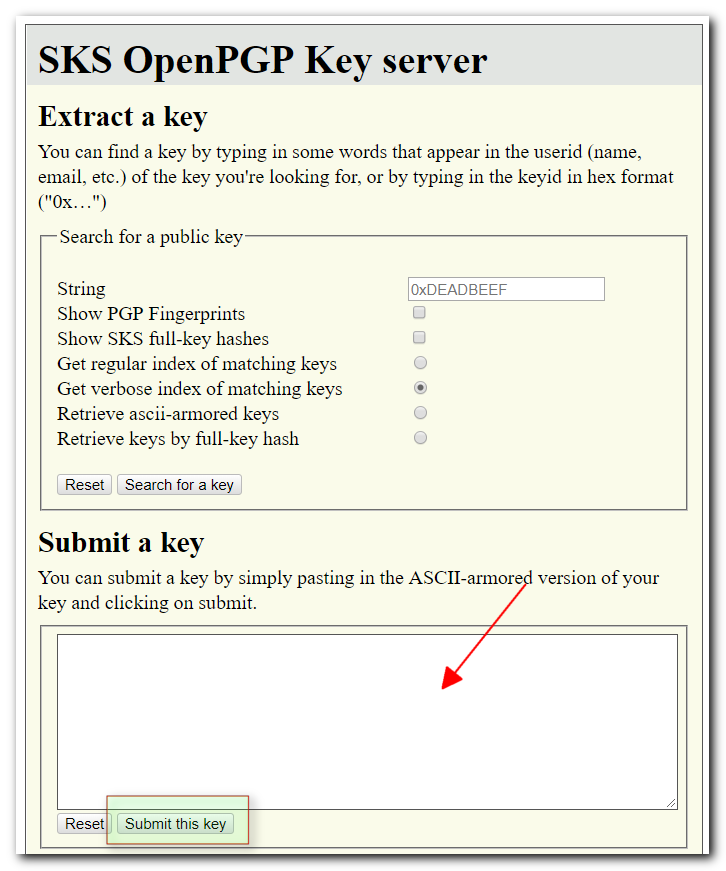
Remember to add your public key to a keyserver! Copy it to your Clipboard and paste in the website (as displayed below). Press “Submit this key“ and you’re all set. Link to Keyserver is: https://keyserver.ubuntu.com/
Part 4 – Obtaining your private key
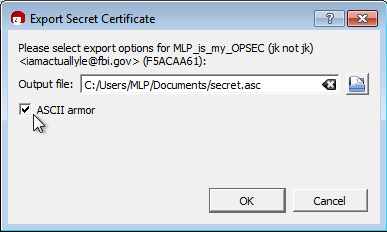
For backup purposes or for purposes of moving to another PC with keeping an ability to “Decrypt”. Just as easy as obtaining your public keyRight click on your key, select ‘Export Secret Keys…’
Select where you want it saved, give it a name, check ‘ASCII armor’, and click ‘Ok’
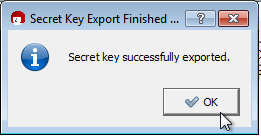
You now have your private key
Remember to keep this in a safe place, and never share it!
Part 5 – Importing a public key
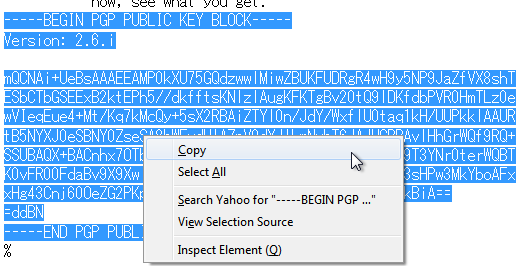
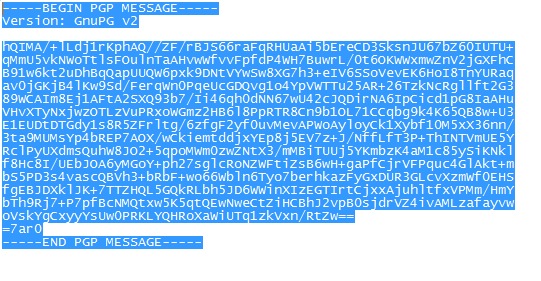
It’s impossible to send a person an encrypted message without their public key. Find a public key you want to importCopy everything from ‘—–BEGIN PGP PUBLIC KEY BLOCK—–‘ to ‘—–END PGP PUBLIC KEY BLOCK—‘, see the picture for an example
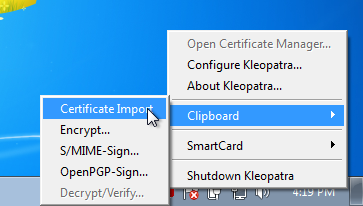
In your task bar, right click on the Kleopatra icon, go to ‘Clipboard’, then click ‘Certificate Import’
If it worked, you should see a window pop up, click ‘Ok’

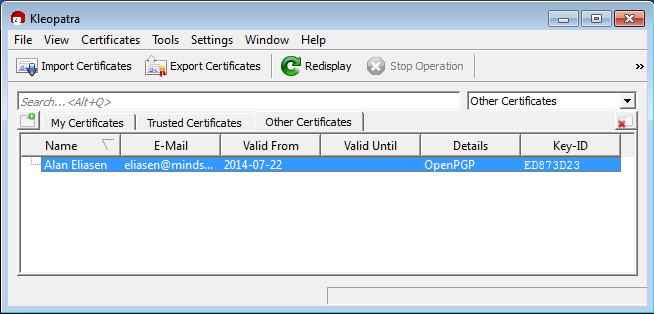
You should now see the imported key in Kleopatra under the ‘Other Certificates’ tab
Thanks again Alan!
Part 6 – Importing your private key
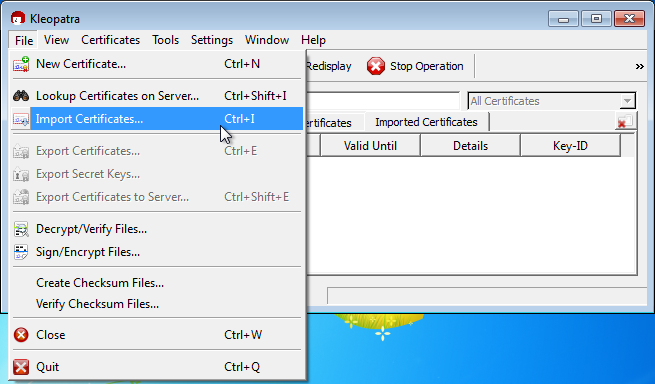
This is only for cases when you would like to move your key to any other computer or for Recovery of a Backup in case of smth. happened to your previous PC. Simple stuff.Go to ‘File’, then click ‘Import Certificates…’
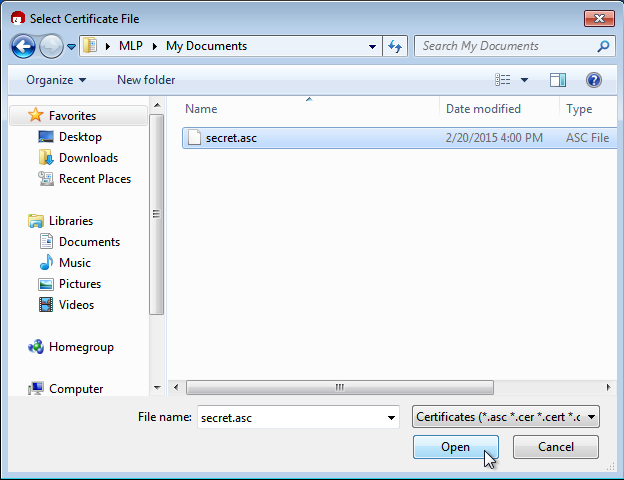
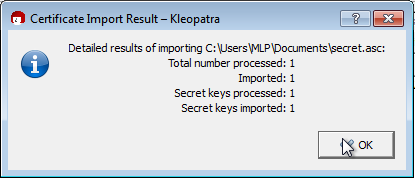
Browse to where your private key is, select it, then click ‘Open’
It will import your private key, and pop up a window to confirm. Click ‘Ok’
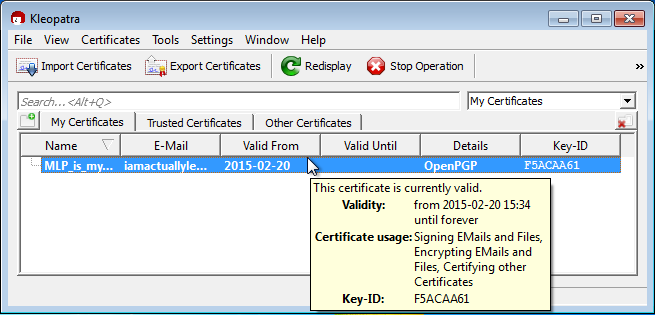
You should now see your key information under the ‘My Certificates’ tab
Part 7 – Encrypting a message
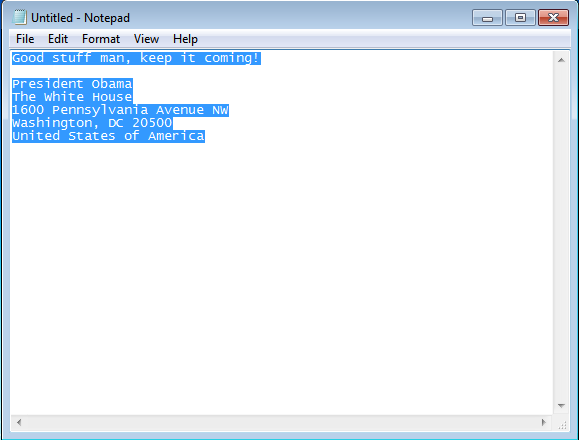
Now that we’re ready to go, lets go ahead and send a message.Open up your text editor of choiceType out your message, select it all, and copy it
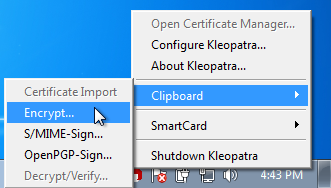
In your task bar, right click on the Kleopatra icon, go to ‘Clipboard’, then click ‘Encrypt…’
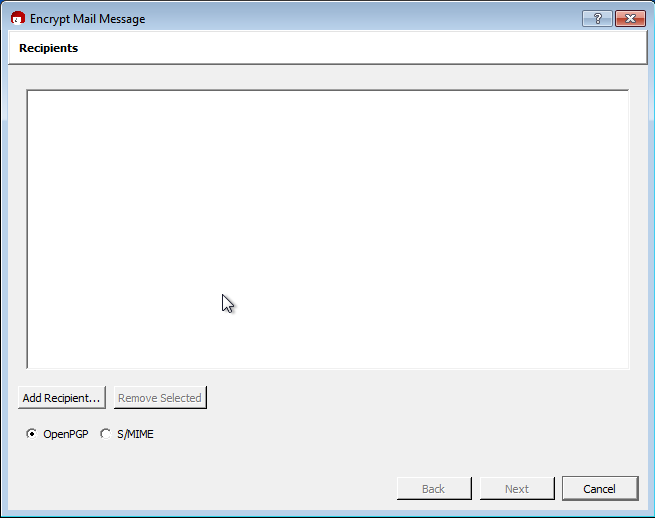
This gorgeous window will open. Click ‘Add Recipient…’
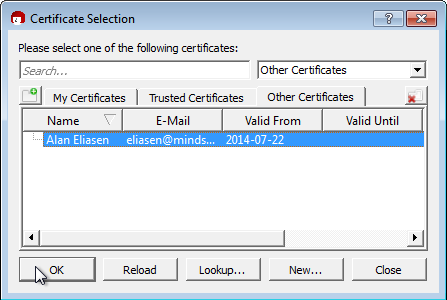
Another window will appear. Click the ‘Other Certificates’ tab, then select who you want to send your message to, then click ‘Ok’.
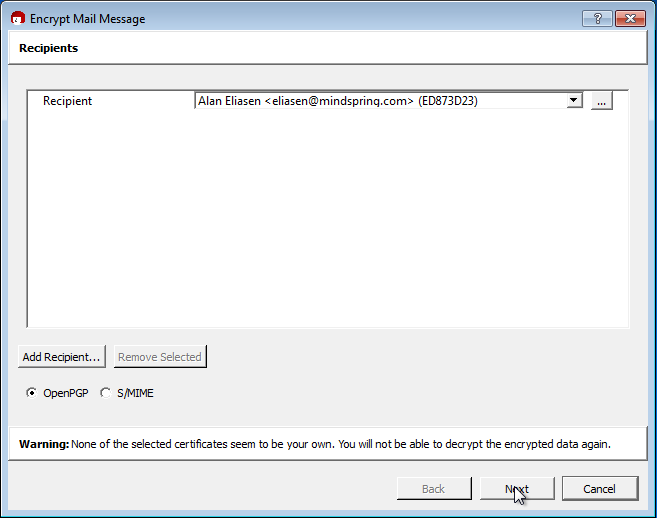
You should be back at the previous window with the recipient listed. Click ‘Next’
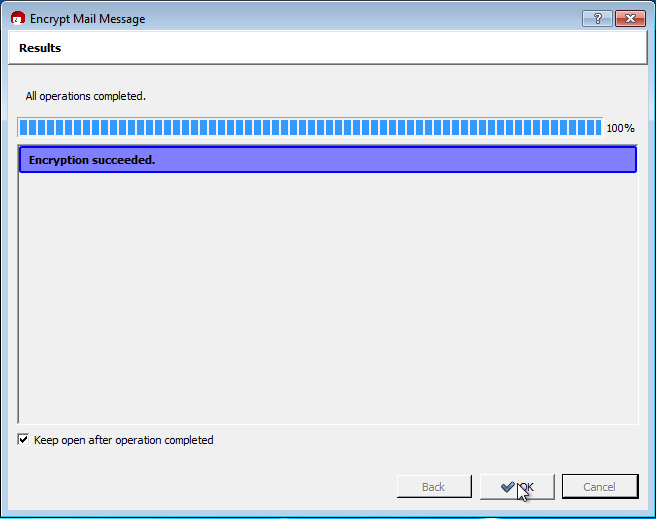
If all went well, you should see this window. Click ‘Ok’
Your encrypted message will be in your clipboard, all you need to do is paste it into the message box and send
Part 8 – Decrypting a message
This is just as easy as encrypting.Copy everything that was sent
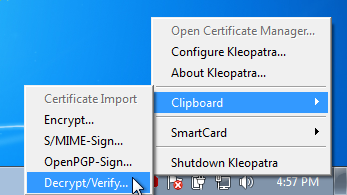
In your task bar, right click on the Kleopatra icon, go to ‘Clipboard’, then click ‘Decrypt/Verify…’
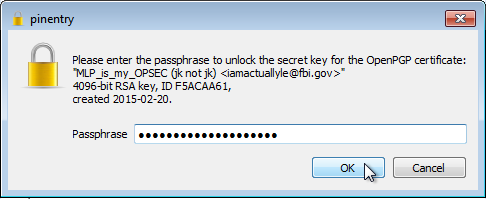
A window will pop up asking for your passphrase, enter that then click ‘Ok’
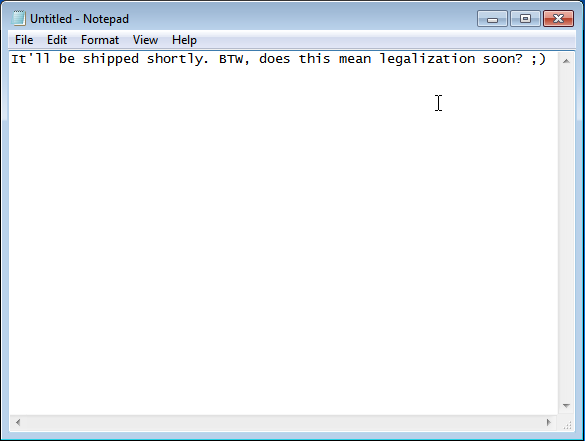
A window should pop up verifying it was decrypted, and copied to your clipboard. Click ‘Finish’Open your text editor of choice, and paste your message
Part 9 – Conclusion
I’m hoping this was in depth enough for you Windows users out there. PGP can seem complicated at first, but with an hour or two of your time you can see it’s actually pretty simple. There’s obviously more behind it, and different tools that can be used, but we might save that for another time. Stay safe everyone! Encrypt all messages!